Guide to the Lone Lands
by Reillan
This guide is intended to push adventurers through Lone-lands content quickly and efficiently, so that they are not having to go back and grind the same mobs again or go to the same point again if possible. By following this guide, all your travel is maximized to take advantage of quest proximity.
This guide is intended for both Solo and Full-group questing. All text intended for solo players is the standard black color, while full-group content is in red. Additionally, solo missions that are preceeded in a chain by fellowship content are listed in red. Finally, some quests marked as fellowship quests can be done single-player, and I have left these in black. I have personally done these quests on 3 completely different class types, and thus believe they can be done solo by all classes.
There is one rule to follow throughout this: unless I tell you to hunt for a specific mob, avoid all aggro.

We have devided this guide into 3 parts:
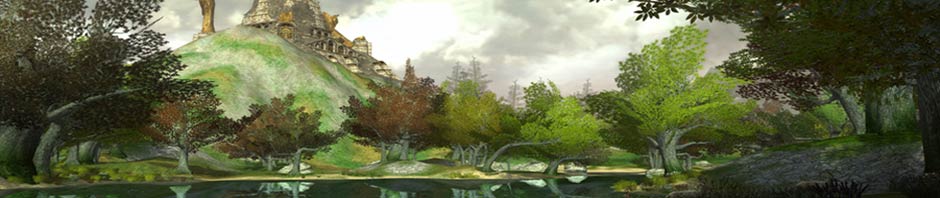
Phase 1: From Bree to Ost Guruth
Recommended level: 18
Hopefully, you've already finished Book 1. If you have, you'll have picked up a Foreword quest from Gandalf to visit Ost Guruth.
Starting in the town of Bree, talk to Lily Sandheaver and Thomas Thistlewool to pick up Thistlewool's Sullied Name and Candac's Delay. If you haven't already, talk to Tad Ashmead as well and pick up the Homesteads of Eriador quest. Go to the south gate of Bree and run south and east, south of the Midgewater Marsh. You can turn in your Homesteads quest along the way (and do the other housing quests there, if you like), then continue along the road to the east to reach the Forsaken Inn. and bind yourself to the recall stone here.
Go into the Forsaken Inn and take every quest available, turning in the quests you have done. Before leaving, verify that you have:
- Falster's Request (From Falster the Fox)
- Candac's Obligation (From Candac Brightwood)
- Missing Supply Cart (From Anlaf the Forlorn)
- Blankets from the Baying Wolves (From Arinora)
Leave and go west along the road you came in on. Find the missing cart and driver. Return to the Forsaken Inn and head south into Minas Eriol. Pick up the stable route on your way. Head through the canyon and take your first left, and stay on the left side as the path becomes uneven. There are two different things you're trying to loot here - piles, one of which is glowing, one of which isn't, but when you highlight them they both give you a treasure-chest icon. Loot every one that you can until you have Candac and Falster's quests done. Kill any wolves that attack you, but don't go hunting for more. Avoid the wargs, if possible.
Return to the Forsaken Inn and turn in those quests, taking any followups offered. Leave and head to the east, toward Ost Guruth. Continue running along the road east until you start seeing purple Wargs and Spiders along the road (avoid them), then look at your map and find the horse point to the north of the road. The best angle to approach it without aggro is from directly south of it, so head there and run north. Head up the stairs and talk to Frideric the Eldar. Turn in the Foreword to Book 2. Take every quest he offers, but do not turn in the "Ost Guruth to Trestlebridge" quest yet - that will wait. Two quests in particular you should be looking for are "An Offering of Peace" and "Ost Guruth to the Forsaken Inn." It will also save you time if you go around the rest of Ost Guruth and pick up the rest of the quests.
Go back down the stairs south of Ost Guruth and pick up the stable route, then swift travel to Bree.
Once in Bree, turn in Falster's Delivery, Candac's Delivery, and talk to the Chief Watcher to continue the Fair Trade with Bree quest.
Return to the Forsaken Inn (Including this point and going forward, when I say "Return to the Forsaken Inn" - use your Map to travel if it's available unless I specify otherwise). Use a horse route if your map is not available.
Phase 2: Go Out into the Lone Lands and Kill Boars
Make sure to pick up the following if you have not already:
- By Hoof and Crook (Obtain from Arinora)
- A Fitting Meal (Old Mugwort)
- Noble Deeds (Constable Bram Ashleaf)
- An Offering of Peace (Should have gotten when you were in Ost Guruth from Fridiric the Eldar)
We'll work on all five at once, but we'll also work on a few more. Head roughly northeast to S 30.1, W 37.9. Kill any Boars you see along the way, but try to avoid other mobs (killing mobs will only waste time you don't need to waste - but if you really love killing mobs, knock yourself out). Once you reach that location, talk to Candaith and pick up Rise of the Orcs. Head up either slope leading away from Candaith either south or northwest, and then head west into one of the orc camps, killing the Pillagers and Foul-Arrows you find. This should give you the orc items you need for Noble Deeds. Return to Candaith and take An Orc Messenger. Go back up the slope to the south and be on the lookout for roving orcs. Messengers move regularly between the camps, especially on the hill just southwest of Candaith. Kill one and return to Candaith.
Pick up Orc-thieves and War-master Uzorr. Go north out of Candaith's camp and follow the path past the orc camp, on the outside of the old stone wall east of the camp. At the end of the wall, head northwest (jumping to get off the path, as needed). Keep heading northwest and you'll reach a river and crossing. Go north, then west (not going through the old stone building full of birds). Be on the lookout for Orc Archers. Kill one if you see it to claim Candaith's bow. Head up toward a stone tower on a rise, and jump off this toward the west. Kill the wolves needed for your Fair Trade with Bree quest. Go back to the river crossing. Groups can head east up the river to War-master Uzorr's camp. Follow the winding paths of bridges up until you finally reach the end, where Uzorr is. Solo players may be able to get here and kill him on their own, but it will be very difficult for some classes, especially if there is respawn to avoid. Once finished, return to the river crossing. Return to Candaith and turn in your quests. Group players will have two follow-up quests now. Head on up to the top of Weathertop for Light in the Darkness, then return to Candaith. Head south (do not port) back to the Forsaken Inn, killing boars along the way. If you have not yet received all the boar items you need for all four of the boar quests I listed earlier, spend time running around the Weather Hills and Annunlos until you have enough.
Once back at the Forsaken Inn, you should be able to turn in:
- By Hoof and Crook
- A Fitting Meal
- Noble Deeds
- Blankets from the Baying Wolves
- Fair Trade with Bree
Phase 3: Won't You Take Me To Goblin Town
Well, ok, you're not going to the REAL Goblin Town, but Minas Eriol is just as good. Make sure you have the following quests:
- Vengeance for the Lost (Gadaric Munce)
- A Greather Theft (Hunulf Munce)
- Goblin Exiles (Anlaf the Forlorn)
- A Price on their Heads (Falster the Fox)
Head south into Minas Eriol, but this time head straight instead of turning left as you come into the city. This is definitely easier with a group, so you'll need to be patient. Take out goblins any time you think you can grab just one or two, and don't be afraid to run back the way you came if you draw too many. Go around and pick up all the items you need for A Greater Theft, killing the specific goblins you need for Vengeance for the Lost (8 Spear-throwers, 8 Guards, 1 Thrasher). Return to the Forsaken Inn and turn in these three quests. Take the followups. When you turn these in, you should get your first tier of Tales of the Lonely Road.
We have devided this guide into 3 parts:


