Strategy for Book 15 Chapter 12 - One Hope Remains
community.codemasters.com
forums.lotro.com
Introduction
Volume 1 Book 15 starts by speaking with Elrond and is all soloable up until Chapter 12.
In Book 15 Chapter 12: One hope remains, you must protect Amarthiel/Narmeleth and defeat Mordrambor. She runs down a long passageway into four seperate groups of elite gashfra-hai, similar to the ones we know and love from the rift. They are all 9-12K. This part is basically a tank and spank with a good healer watching the group and Narmeleth. There is no real need for alot of CC if you have a good tank - although CC could help alot with the archers. Also note that you should avoid stepping on any lava parts because fire grims will spawn (amazing fire drake graphic). Just stay in the planked wooden walkway at all times. Once done with the last set of elites she will run right into Mordrambor's room where she stops. This is where you will have time to eat and buff up. You must pay strict attention to what she says. She tells you she can not get close to him because the ring Narchuil's pull is strong on her.

Ideas/info for boss fight strats:
- Healer is busy intensely healing - try to have one person other than the healer calling out the marks and telling people to run toward Narmeleth to get it off.
- We tried positioning the healer in front of her and facing the boss and the tank and rest of the group was behind her dealing with the fire grims. For the most part this seemed a good place for the healer. but there was alot of fire damage going on.
- Fire mit pots would be very useful on this instance.
- Have....a good tank (Guardian or Champion), a good healer and alot of DPS
-
Everyone on voice chat. Good communication is a must. - Stay out of range of Narmeleth! ONLY go up to her if you have the death mark.The point of it is, so she does not waste power clearing the other two marks. They are not as important! You can live with them.
- Lowered Graphic settings: On the fight with Mordrambor (as the Grims started coming full force) was a slideshow. Dropping everything to 'low' made a huge difference.
- Grims are also a threat: Its not so much the damage itself, but they can be hard to see, as they look inert after they let off one of their attacks, and can do it from a good distance. They have potentially system-crippling visual effects, and that blinding light you are hit with can be disorienting.
- A good fellowship leader should call out who must run up to join tank. Made it easier to know when to move to him.
The fight
Everybody go the the RIGHT and stand BEHIND Narmeleth and buff up, eat, pop hope. Why do you have to stay on the right?
Because there are several gaps in the floor and you will fall in the lava if fall in one which is instant death.
Then the Tank moves towards Mordrambor. Mordrambor has 59K morale. Mordrambor is static and the Tank stays there the entire fight. It's very important he is there otherwise the minstrel will get aggro.
He gives 3 different buffs:
- The one with the red background is a +50% melee damage debuff.
- The one with the fire background is a +50% fire damage debuff.
- The one with a yellow background is an instant-kill debuff after a 40 seconds.
The Tank wont get any of these debuffs because he will get another buff from Narmeleth called Narmeleth's Champion, this will make you immune to all buffs.
The debuff you'll get when he shouts: Narchuil's makr upon you, <Name>, will give you 40 seconds to run to Narmeleth and get cleansed. It's very important that the rest is standing behind her or she will be to concentrated cleansing other people and the one with the instand kill debuff will be dead.
Once she has cleansed you, you have a condition which looks like the head of Narmeleth. This is your time to tank now, you move up to Mordrambor and just stand next to the tank. Mordrambor's frontal AoE will make sure you get damage to reflect on him. You dont really have to attack him at all because the Buff you'll get from Narmeleth contains: Negate 50% Incoming damage and Reflect 150% Incoming damage. You just have to take blows from Mordrambor and he will kill himself automaticly. (He hits himself up to 3k per hit!)
Every now and then, he holds this huge fireball the final boss in Ost Elendil also has. Well, in Ost Elendil you want to clobber that, dont do that in here! it hits you for like 1.2k so it damages Mordrambor BIG TIME! Feel free to interrupt it when nobody with the reflect buff is near.
You'll probably be only tanking him for a couple of seconds before he shouts somebody else. When that happens, the person tanking moves back, the person who got shouted at moves to Narmeleth and waits untill cleansed. Once cleansed, move to Mordrambor and let him DPS you and therefor himself.
Continue this cycle untill he is down.
But during the fight there will be 3 Firery Grims in the back attacking Narmeleth. This is were the other 5 are concentrated on, killing the Grims. Try to get aggro of them and burn them down. Take them away from Narmeleth (which is static) and kill them otherwise Narmeleth will attack the Grims and forgot cleansing people. Chase the grims as they run from you then run back to the spawn point. Kill them AS SOON AS POSSIBLE!
After this boss, you'll spend another 15 minutes killing sets of adds (Barad Gularan Elite Warriors and some Sorceresses that appear in groups) that again are pretty tough (including around 6 of the "undead BG mobs" that are now Unseen type and can't really be CCed). Then you'll get to the final boss, which thankfully is easy.
Final boss is Mordirith who has approx 190k morale, but he is easy cause he is not summoning adds with him. The only adds that appear are some 'Illusions' he summons, but when you fight them he disappears, so the whole part is easy.
Simply tank and spank - when he changes into another character, they will stick various debuffs on you but nothing too worrying (the one to really watch carefully is the -50% healing debuff). Apart from that the final boss puts a fear debuff on the tank that hits for 400 every 3 seconds so keep an eye on that one.
Watch your debuffs at the Mordirith fight, one is quite funny. When Sara oakheart illusion appears, our tank got the debuff: 'you run at the speed of Sara Oakheart. -50% run speed'
You have to get him as low as 60k morale and then after a nice video, instance ends.
Roles
- Champion can be a tank. He has to use Clobber all the time on Mondrabor. This champ is totally dependent on the minstrel, so you need a VERY good minstrel to heal him all the time.
- Guardian can be a tank or try to hold the adds.
- Minstrels stay on the bridge between the tank and the area where the adds spawn, make sure to have a lot of power pots(even if there is a LM) and heal like hell. Also use your fire metigation buff when you can
- Captain: should help the minstrel on the healing and extra resurrections is handy
- Hunter pulls the grims from Narmeleth
- Lore-Master - should keep Narmaleth and the Minstrel powered. Also can pull the grims from Narmeleth.
- Burglar should stay back behind Narmeleth handling the grims. ALWAYS GO GREEN ON CONJUCTIONS and stuns some of the undead
Book 15 Rewards - Grey Horse
There are some very cool rewards! Main one, i'm sure all have heard of: Grey Horse. It's better than normal and the rep, it is equal in sturdiness with the Moors horse. (Takes 9 hits to knock you off, as opposed to 5 for the rep, and 3 for the normal.)
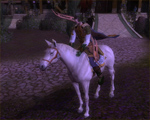
Click to enlarge


